 |
Please read, understand, and follow all safety information contained in these instructions prior to using Skinive.MD. It is recommended to retain these instructions for future reference.
|
This document is a user manual for Skinive.MD, a device developed by Skinive Holding B.V.
1. GENERAL INFORMATION
1.1 Intended use
Skinive.MD Software is designed for use by healthcare professionals in educational purposes and evaluates adult skin structure by a photograph taken with a smartphone’s camera for detecting possible signs of similarity with the classes to clarify the classification and type of skin lesions found in the database of this Software.
The Software is used when connected to smartphones and tablets to capture images of skin and other body surfaces, being processed with high magnification.
This is a reusable, non-invasive device for image processing, monitoring and documentation. The Software cannot be used to make a decision about the diagnosis, presence or absence of a disease on the basis of the online screening, without consulting a doctor and additional investigation.
1.2 Recommendations for using Skinive.MD
Skinive.MD is intended for:
- taking images of skin surface with high magnification
- documenting images and their processing (enlarging, magnifying, zooming)
- classifying the skin formation of the differential diagnosis methods for the presence of potential signs of classes and types of skin lesions
- being used by healthcare professionals for educational purposes to research the skin formations
1.3 Contraindications
- Applying the device to damaged skin (or previously injured skin – biopsy, excision) is forbidden.
- The device cannot be used for diagnosis and clinical decision making.
If the user wants to analyze the formation on the skin, we advise him not to use the online assessment if:
- The user has dark skin (skin type V and VI on the Fitzpatrick scale) or sunburn on the skin;
- The skin area is under the nail (s);
- The formation is very close to the (visible) area with the scar (s);
- The formation and surrounding skin (<5 cm) contain foreign objects (such as a marker, tattoo, sunscreen, skin cream, powder, etc.);
- The formation is surrounded or covered with a significant amount of hair;
- The formation is on the surface of the mucous membrane (eg lips, genitals, sphincter, etc.)
- The formation is in the skin fold
2. PRIVACY AND SECURITY
|
Please read our Privacy and Security Policy on the website www.skinive.com, before using the app.
|
You clearly understand and accept the risk of any unapproved or intentional data disclosure, or any delay, interruption or damage of data or any other information, while data transfer. Keep you User Name and Password private. Failure to do so may also compromise the confidentiality of your information.
3. SYSTEM CONFIGURATION
Skinive.MD works on mobile devices with Android and iOS operating systems. It is compatible with Android 4.4 API level 19 and above; iOS 12 and above. The App requires Internet connection to store data in the database, as well as access to internal memory and camera.
Smartphone Camera Features:
- Camera Resolution 10 MP
- Aperture / Aperture ƒ / 1.9
- HDR support
- Optical stabilization
- Autofocus (Dual Pixel or Pixel Focus)
- Pixel Size: 1.0μm
- Matrix Size 1 / 2.8 ″
| Do not install the Skinive application on a non-original (fake) iOS or Android device |
|---|---|
| Do not install the Skinive application on a jailbreak iOS or Android device |
4. HOW TO USE Skinive.MD
4.1 Warnings and important notes
| It is forbidden to download or transmit any messages or content of any type that may violate or violate any of the rights of any of the parties |
|---|---|
| It is forbidden to use this application for any purpose in violation of local, state, national or international laws |
| It is forbidden to use this application as a means of advertising or other distributing of undesirable materials to the third parties |
| You may not use this application to publish or transmit material that is illegal, obscene, threatening, abusive, abusive, slander, hateful or embarrassing to any other person or organisation |
| It is forbidden to try to disable, “hack” or otherwise interfere with the proper functioning of this software |
| Skinive B.V. does not give any guarantees regarding the time required for any request, and if you are experiencing an emergency medical situation, you should not seek help from this guide but should contact emergency medical help immediately. |
| Before using Skinive, make sure that the device is working properly. |
| Never cover the light source, the flash or the camera while taking the image! |
4.2 Installation, Registration and Logging In
4.2.1 Installation and registration
Follow the application instructions (Google Play Market, App Store) during installation and registration.
When the application boots for the first time or when the user logs out, a set of incoming screens is displayed that gives a brief introduction to the Skinive application.
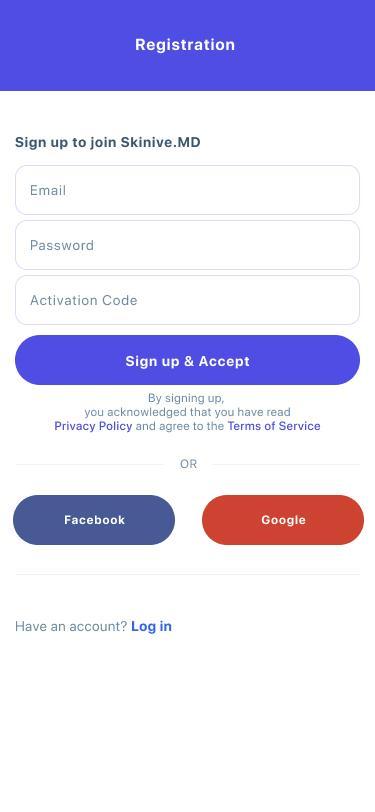
The registration / login procedure can be started at any time from any of these screens (Fig 1).
 |  |  |
| Pic. 1 | Pic. 2 | Pic. 3 |
If you are a new Skinive user, you can create a new account by clicking the “Register” button (Fig 2). The following screen will appear, which allows you to choose whether you want to register using your Doctor at Work social network account or email address.
Before you can register for a new account, you must accept the Skinive Terms and Conditions and Privacy Policy. They can be read by clicking on the appropriate links on the registration screen. If you agree and want to create an account, check the box next to it.
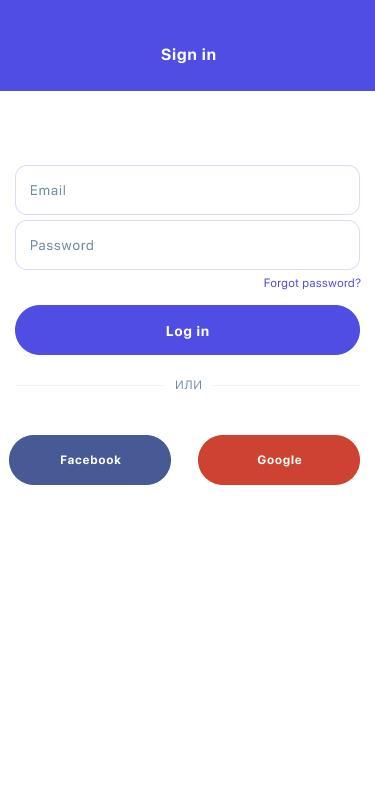
If you have already used Skinive, you can log in using your personal social network account or your email address and password (Fig 3).
4.2.2 Taking skin photographs and evaluation.
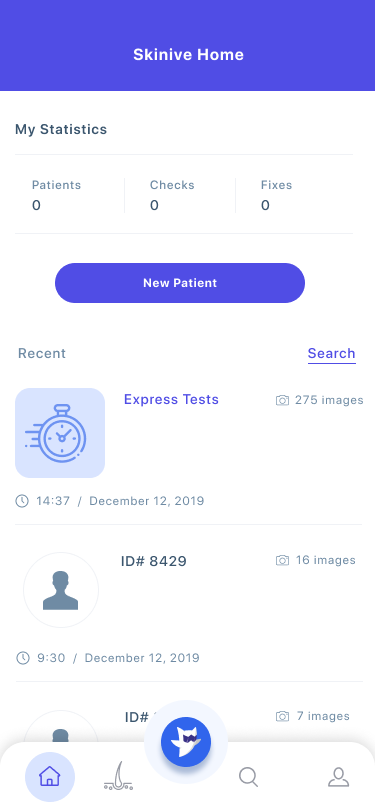
Click the camera icon or select New Test from The Application Menu.
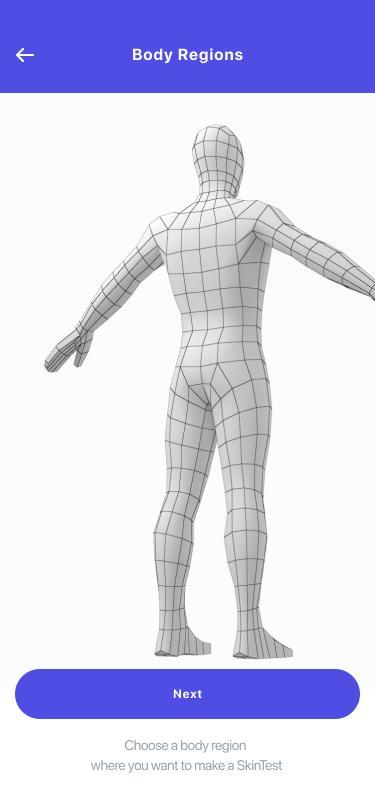
A schematic figure of a person (front and rear view) will appear in the dialog box (Fig 4). You need to click on the corresponding part of the human figure where the skin lesion that you want to photograph is located.
 |  |  |
| Pic. 4 | Pic. 5 | Pic. 6 |
If you are a new Skinive user, you will see a screen with pop-up instructions for using the camera, directing you to the camera to conduct the first test.
As a registered user, open the camera by clicking the camera button in the lower menu. Previous ratings and photos are available from the archives on the home screen.
If you need more help, you can view the guide to the photo-taking process by clicking the button with a question mark in the upper right corner. This will show you a video explaining the process.
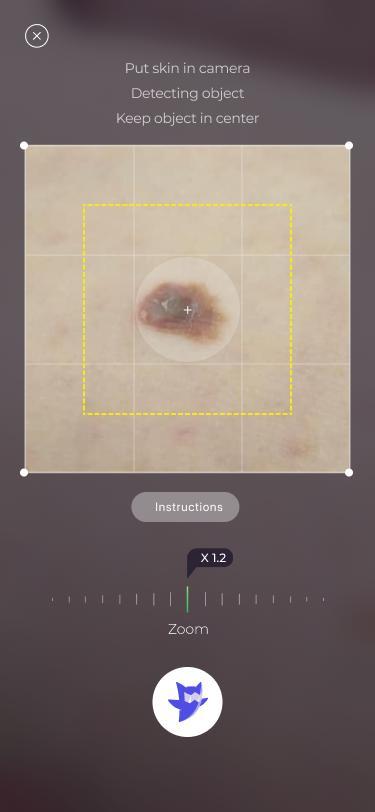
To take a picture, point the centre of the camera at the skin lesion and make sure that at the area around the formation there is not too much hair or shadow. Centre the skin formation in the centre of the camera viewfinder, stabilise your smartphone and take a photo (Fig 5).
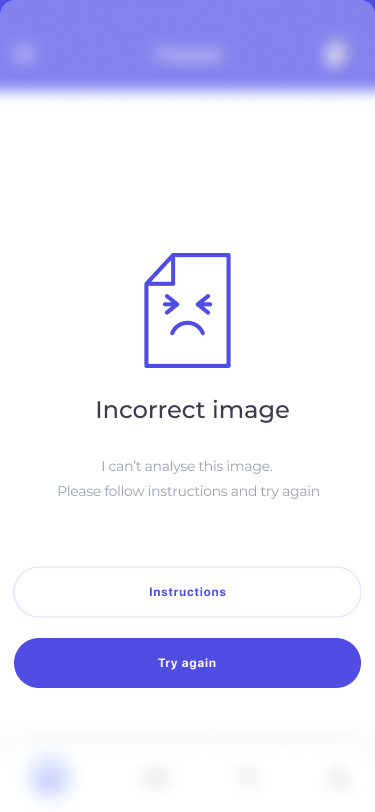
After successful shooting with the camera, the application will verify that the captured image is of sufficient quality and is exactly the skin stain that you want to evaluate. In case of unsatisfactory image quality, you will need to take a new photo of the same skin object (Fig 6).
 |  |
| Pic. 7 | Pic. 8 |
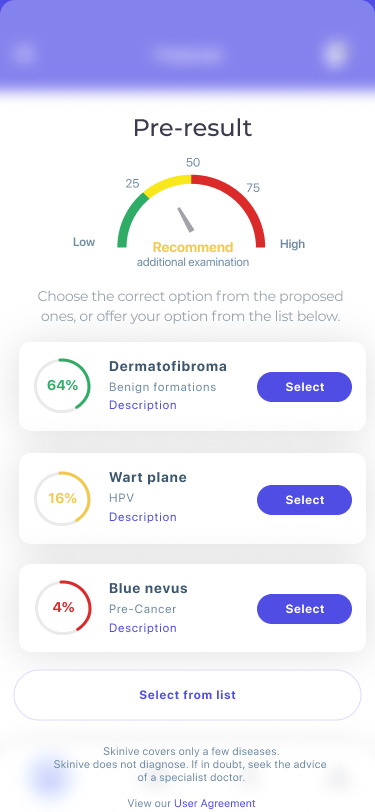
If the image quality is satisfactory, it will be transmitted to the server for evaluation.
The algorithm evaluates the percentage of similarity by visual signs and offers 3 options with the highest similarity percentage. If there is no correct nosology in this list, the user must click on the “Select from the list” button and independently select the correct nosology from the complete list. Then the user goes to the screen with the result card, where the image and metadata are stored.
 |  |
| Pic. 9 | Pic. 10 |
After answering the questionnaire, you get the opportunity to save the image in your account in a folder. It can be a new folder or an existing one. Access to folders in your personal gallery can be obtained from the main screen of the application.
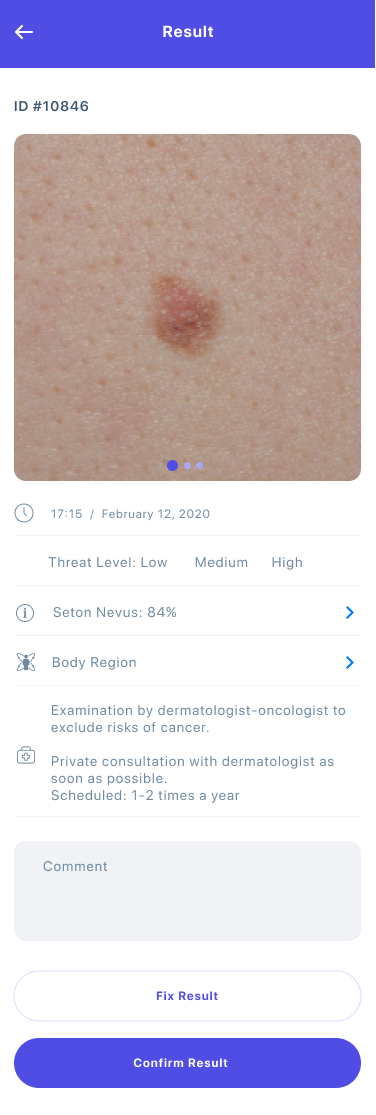
After answering the question, the assessment will return with a differentiated result (3 options for types of skin formations with 5 photos).
After choosing the result, you can choose whether you want to add a comment, correct the evaluation result, send the image for examination or just save it in your account.
All results produced by the application, including final recommendations, are used for informational purposes only. You should not draw any conclusions or make a diagnosis based solely on the results of the assessment.
You can also provide the doctor with the application data results for consultation.
4.2.3 Storage in folders
To store images of various patients, you can save them in various folders. When saving the image evaluation result, select one of two options:
New patient (new folder). A new folder will be created for the new patient, which will be automatically assigned a name containing a unique identification number of the following type: PatientID 0000001
Existing patient (existing folder) You need to enter in the pop-up search bar a unique identification number of the following type Patient ID 0000001
4.2.4 Manage your profile
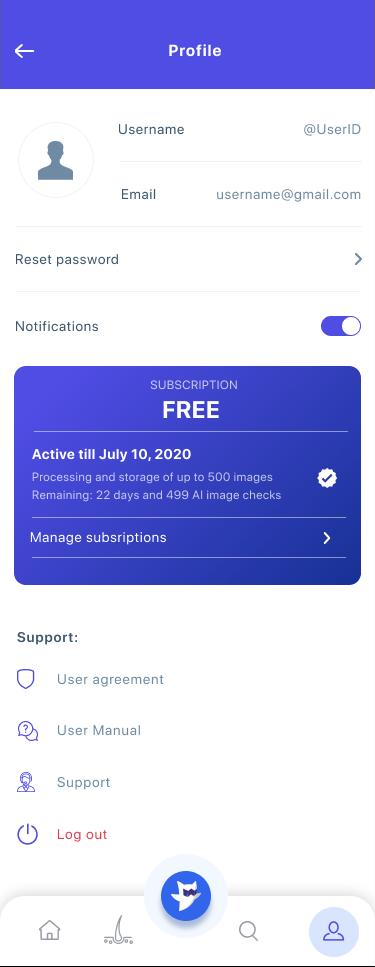
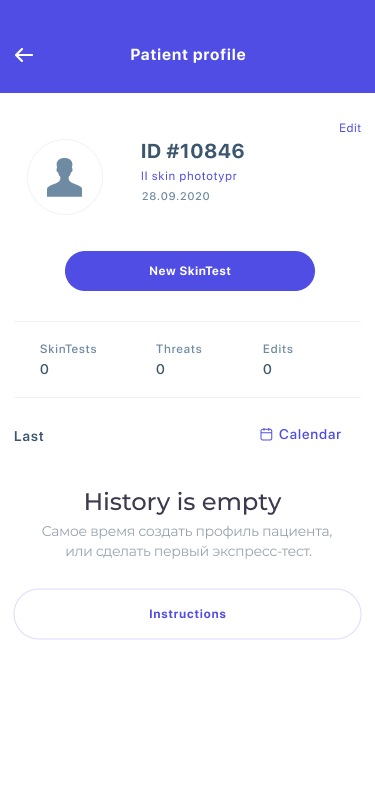
Click the profile icon in the application menu. In the profile you can (Fig 8):
- enter a name, enter your contact details (email address)
- view your profile statistics (number of your images)
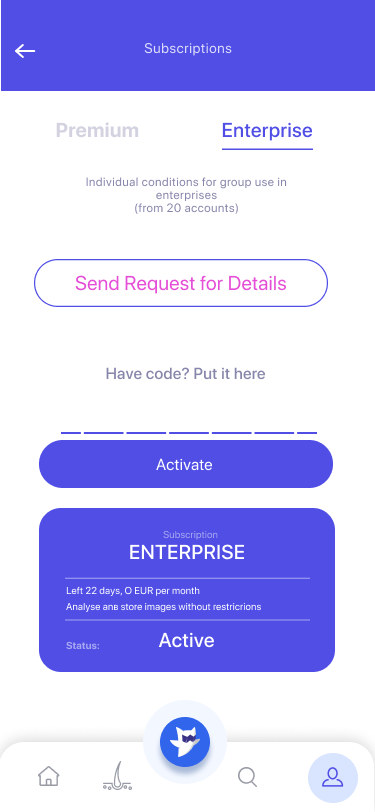
- view your subscription status
- enter your subscription activation / renewal code
 |  |
| Pic. 11 | Pic. 12 |
4.2.5 Manage your archive
In the application menu, click on “My archive” to see the contents of your archive.
Open the “All Images” folder to find all your photos without a category in one place.
Each folder displays the last taken picture, the result of the assessment of the dominant risk in this folder and the number of pictures.
Click on the calendar to search for images by shooting date (Fig 9).
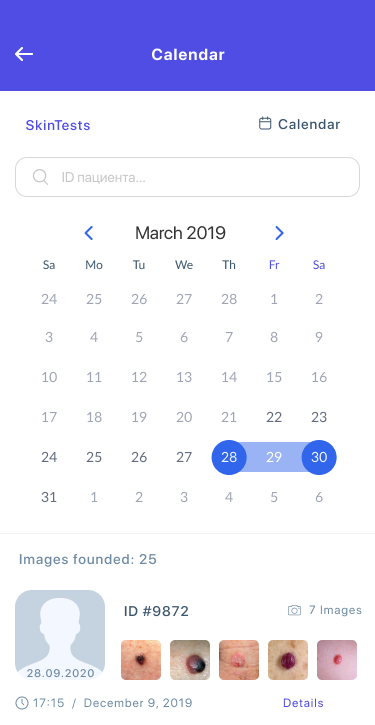 |  |
| Pic. 13 | Pic. 14 |
Click on a folder to see the contents. From here you can edit the properties of a folder or delete it.
To see details about each image, click on the image from this view.
Click on the coloured risk label to see more information about the result of the assessment.
Click on “Change Result” to submit your risk assessment.
Click the Notes button to view, add, or edit notes associated with this image.
Click the Trash button on the bottom panel to delete this image and its rating.
4.2.6 Settings
Error messages
Function for capturing images (mobile device level) Failure mode: cannot capture the image. Failure effect: the image cannot be saved, displayed to the user or sent for analysis; no result Cause of failure: it is not possible to allocate memory at the level of the mobile device. Proof of Risk Mastering: informs the user with the message: “Image not taken”
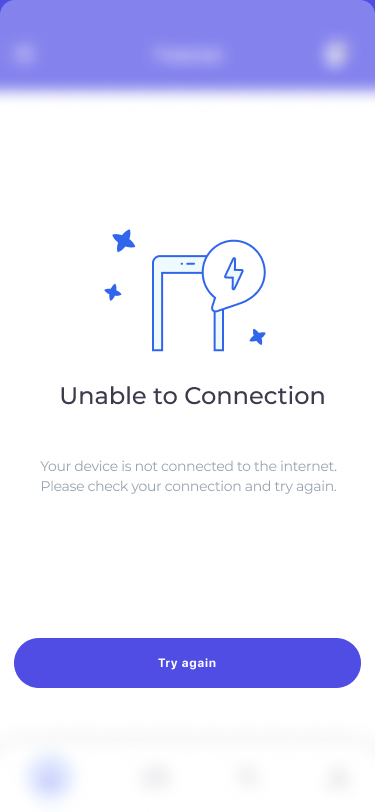
Function Send an image to server (mobile device level) Failure mode: image cannot be sent. Failure effect: no analysis result or image is not saved in archive Reason for failure: there is no internet connection. Confirmation of risk management: informs the user with the message: “No Internet connection”
Function Receive image (backend level) Failure mode: image cannot be sent to the server for analysis Failure effect: image cannot be analyzed Failure reason: image cannot be analyzed (received damaged) Risk management confirmation: informs the user with the message: “ Image cannot be analyzed. ”
Function Analyze image (backend level) Failure mode: image cannot be analyzed Failure effect: image cannot be analyzed; no result is provided Cause of failure: Poor image quality (low light or blurry image). Confirmation of risk mastering: inform the user: “Image cannot be analyzed”
Risk factors
Image quality is too low for analysis. Through a dialogue message, the user is notified that he must take a picture of a higher quality.
The user cannot provide adequate lighting conditions for the picture to be visible. In this case, the shooting should be delayed until the proper conditions are created.
The user wants to take a picture of the lesion in an area of his body that he cannot reach. In this case, request help from another person or doctor
Malfunction
In case of malfunction:
Try to determine or correct the cause using the description in this document (section Error Messages, Troubleshooting).
If it is not possible to determine or correct the cause using this document, contact Skinive B.V. at the contacts specified in section 6.
5. WARRANTY AND LEGAL NOTICES
|
Please read our Warranty Information and legal notices (including the disclaimer and copyright information) on the website www.skinive.com, before using the app. |
|---|
6. FOR HELP AND ASSISTANCE
6.1 Contact Information
For general and product-related comments, questions, or concerns, please contact the local reseller.
WiseAI LLC, UNP 193107247
220073 Minsk, st. Timiryazeva 97, office 22-1
Contact e-mail: info@skinive.com
Please report any serious incident that has occurred in relation to the device injury or adverse event to the local competent authority and to Skinive Holding B.V.
Please refer to manufacturer website for contact info: www.skinive.com